
Guide
How to design for print; a simple guide.

There are only two sides to design: print and screen. That is, you either design for print or screen.
When you design for screens, the final form of the design is usually shared and used on devices like smartphones and computers. An example is an e-flyer for an advert. When you design for print, the final form of this design is intended to be printed, and the result will give final products like business cards, book covers, flyers, brochures, labels, t-shirts or packaging design. Design for print and screen have a lot in common and also important variations that most people don’t care about.
At Waaprint, we provide on-demand printing services for small businesses and graphic designers. We care about our customers getting the best services, and this begins with their print files.
In this article, you’ll learn a simple guide to designing for perfect print results that will wow your clients or give your packaging a dazzling look.
Whatever you’re designing for, this simple guide will guide you through. Let’s get started.
Use CMYK Color mode
When it comes to print design, what you see on screen is often different from what you get from the printer. RGB colour mode, which is made up of red, green and blue, is used when designing for a screen, but printers work with the cyan, magenta, yellow and black colour set — commonly referred to as CMYK.
Most of the time, when you click on New File to start a new design, you will be presented with all the options to set up your file and your defaults in RGB. Be sure to change to CMYK.
Confirm image size and resolution
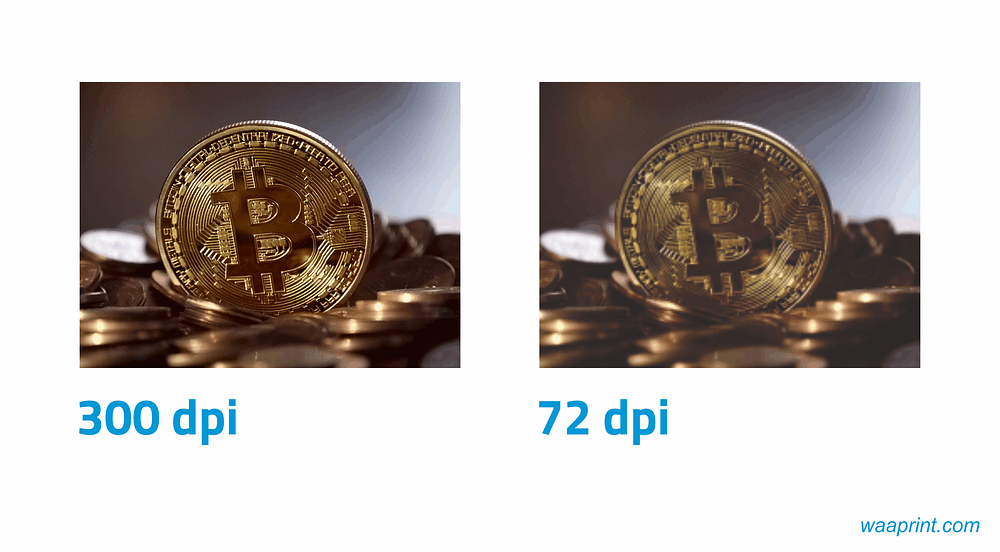
Use a high-quality image in your design. A low-quality image might look good on screen but not when printed. Also, confirm image resolution, as 300 dpi is considered the basic standard.
Most of the time, when you click on a new file to start a new design, you will be presented with all the options to set up your file; choose a resolution of 300 pixels/inch.
Add Trim
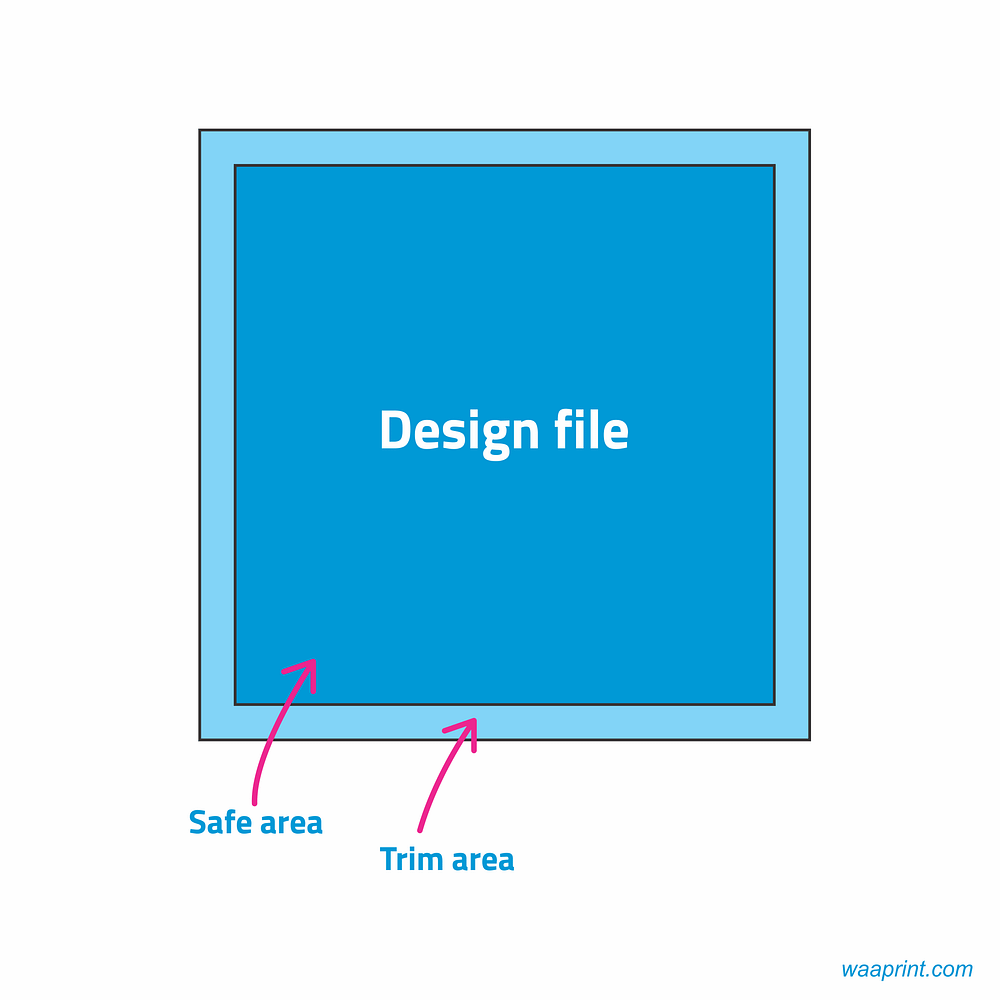
If you’re designing for print, you must leave enough trim. Trim is a space around the edge of your designs so as to leave room for trimming. The outer edge of the trim serves as the cut line where the product will be trimmed when it comes out of the printer. Anything outside of that trim line will likely be cut off, and anything inside(safe area) will remain.
It is always important to add trim in order to prevent content from getting trimmed away by accident.
Proofread
Yes, proofread your design once again before sending. Check punctuation, spelling, and grammatical errors. This type of error or mistake can result in wastage or portrait bad brand image. Once your print product is in the hands of your consumers, there’s no way to update it in real-time.
Legible font choice
Our screens are capable of managing much finer detail than print. It’s worth double-checking your type design (font). Make good use of colour context. For example, red-coloured text appears more brilliant against a black background compared to an orange background.
Finally, create a high-resolution PDF
At Waaprint, PDF is one of the file formats we support when sending a design file. PDF files are mostly lossless printable file formats, perfect for just this purpose. Once you’ve got everything saved in PDF at the highest resolution, you’re all set!
Need this printed?
Waaprint delivers business cards, banners, apparel, packaging and more — anywhere in Nigeria.
Get a Custom Quote